| BenLo Park |
| Back |
| Next |
| Contact |
|
Links: Charles Benton KAP Encyclopedia KAPER Scott Haefner KiteKam and lots more |
Kite Aerial Photography for the Simple Minded
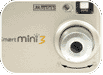
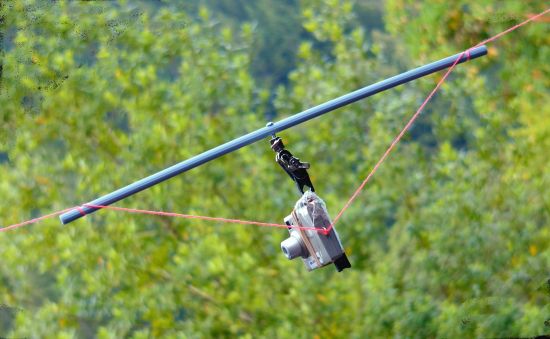
The desire to see the world from above is not uncommon. Although there are many ways to get a bird’s eye view of the world, there is probably no simpler or cheaper way to do it than with a kite. Arthur Batut took photographs of Labruguiere France in 1888 and George Lawrence recorded the devastation of the 1906 San Francisco earthquake with his 49 pound (22kg) camera lofted on a giant kite. Modern digital cameras and new stable kite designs make the task a lot easier in the twenty-first century. A small parafoil kite and a tiny digital camera suspended from the kite will let you join the ranks of kite photographers this weekend. The Kite The Parafoil 5, made by Go Fly A Kite, turned out to be the perfect choice for this project. It comes complete and ready to fly with 500 feet of line. As there are no struts to bother with, the kite, line, and winder pack into its 6"x9" nylon pouch with room to spare for the camera. This kite is large enough to lift the camera and more than 500 feet of line in a gentle 10mph breeze and small enough to be easy to handle and stable with a single line. Before attaching the camera, I flew the kite once to get the hang of it. There really isn't much to do except hold it up and let the line out slowly. The camera is light enough that it can be attached to a radio controlled helicopter or plane. The Camera The Mustek Mini3 is an interesting little camera. Although advertised as a 3.1M Pixel camera, it only has a 2.1M pixel sensor. It can take 30 1600x1200 photos, or 180 640x480 photos. It will also take a 120 second 320x240 video at 15 frames per second. Photos and video are downloaded to the computer through the USB port and the battery is charged that way, too. The camera weighs less than 40g (1.4oz), so it doesn't take a lot of lift to fly it. It can be flown by kite, balloon, or R/C plane with ease. Last year, I used velcro to attach it to the side of an inexpensive park flyer electric plane and was surprised how little effect it had on the plane’s aerodynamics. With a plane you don't have to wait for the wind to come up. You do have to wait for it to die down, though. The Simplest Solution I created a sling for the camera out of a few feet of string. The camera was taped to the sling with packing tape in such a way that it hung at an angle suspended from two points about 6 inches apart. Before launching the kite, I let out about 10 feet of line and tied the sling to the line at the suspension points, so that with a taut line, the camera would be suspended about 8 inches below the line pointing generally downward. When everything was ready, I launched the kite and carefully played out the line. When the kite was stable and ready to fly, I started the camera in video mode and played out more line. As the kite climbed, the camera turned in different directions taking a dizzying video of the surrounding area. After 2 minutes I brought the camera back to the planet. Shutter Control Unmodified, the camera will take 2 minutes of video. A sample captured from video is shown on the images page. The next step was to create a shutter control that would snap pictures automatically. Opening up the camera revealed that a single SPST switch closes to take a picture. There is a potential of 3 volts across the switch. This is enough to drive a CMOS 555 timer which requires almost no power. For less than a dollar in parts, it was possible to add an automatic shutter control which takes one picture every 5 seconds until the camera is full - about 15 minutes at 640x480 resolution. Details of the shutter control. Recently, I have developed a microprocessor based shutter control which can be programmed to take time lapse photos and could operate multiple switches when necessary. This will work with more cameras, if adapted to the particular needs of the camera. Check out the Shutter Control for the GoPro HD Hero camera. A Better Sling The string sling proved that the kite was easily capable of lifting this camera and even more weight. In order to gain more control of the direction in which the camera points, and to make it easier to attach and detach the camera from the kite line, I concocted another sling with a ball joint which allows the camera to be aimed in any direction when it is attached to the line.
The main horizontal support is a piece of plastic cut from a coat hanger which is attached to the kite string. A ball joint, borrowed from a Helping Hands Tool, clamps to a screw through the horizontal support near the middle. A piece of plastic is attached to the other end of the swivel and the camera is attached with a rubber band. Details of the sling construction. The Images On the next page, you will find some of the images I have captured with this simple sytem.
More to come ... |
|
The Kite
Frameless Design |
|
The Camera
640x480 to 2048x1536 |
|
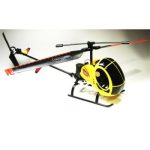
The Helicopter
Ready to fly |